Time Intelligence
Configuring Time Intelligence at the data flow stage creates additional logical columns and places them into a separate time intelligence display folder. It also enables the building of date hierarchies later on, which is important if you want to enable drill functions for dates.
How to Configure Time Intelligence
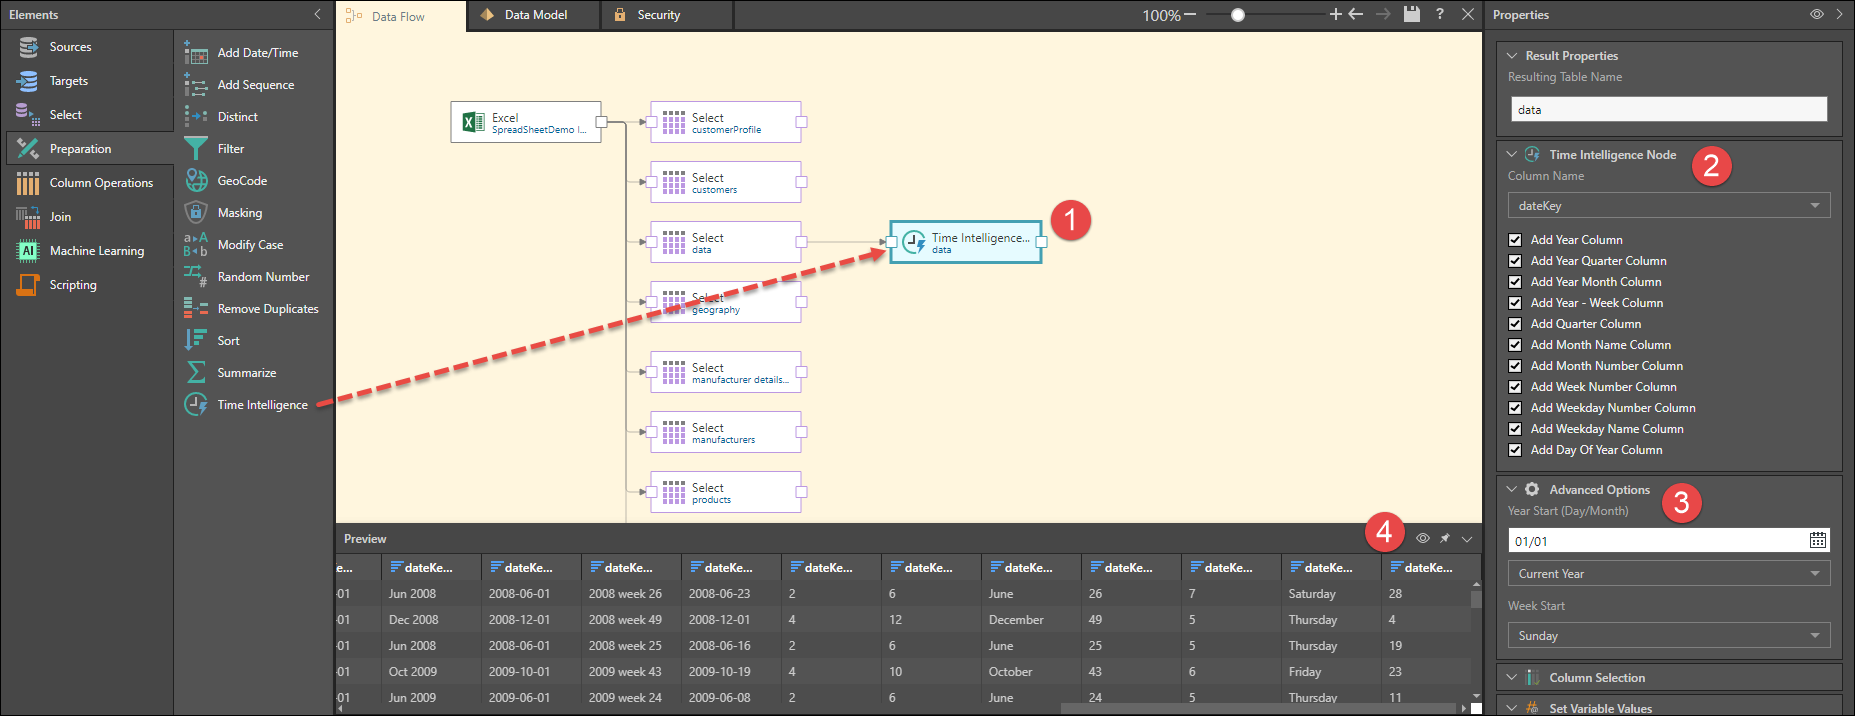
- Connect the Time Intelligence to a table node containing the relevant date or date/ time column.
- From the Properties panel, go to the Time Intelligence Node window and select the date/ time column you want to perform time intelligence on, then deselect any columns you don't want to include.
- Open the Advanced Options window to set your year and week start dates. Choose the start day and month from the calender of either the current year or next year; the given date will be treated as the first day of the year. This enables you to set the year start from a date other than January 1. Next, choose the week start; select the day that should be treated as the first day of the week.
- From the Preview panel, click the preview icon to load a preview of the table with time intelligence columns.
NOTE: You can create this intelligence for more than one date time field per model.

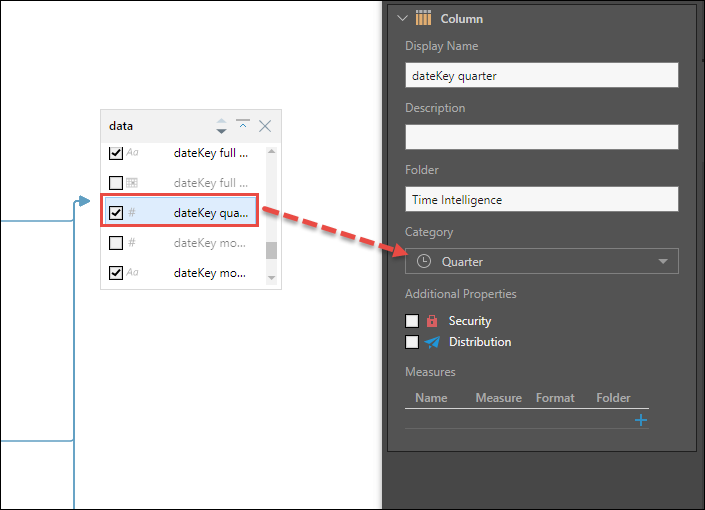
Progressing to the Data Model component, you'll see under Tables that each column generated by the Time Intelligence node is automatically assigned to the relevant category:

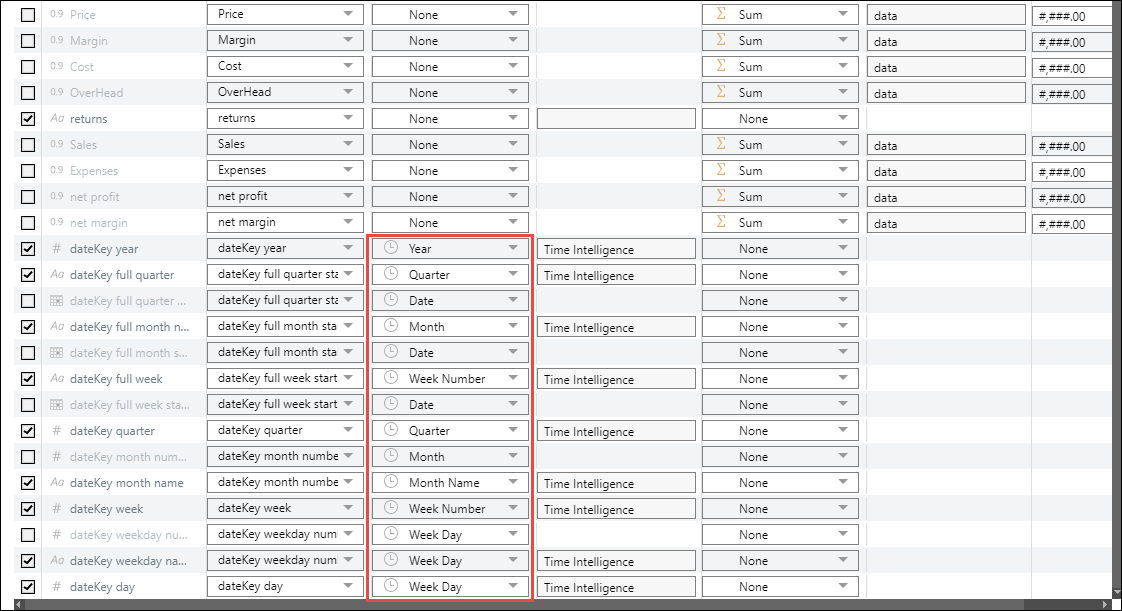
This can also be viewed from Columns:

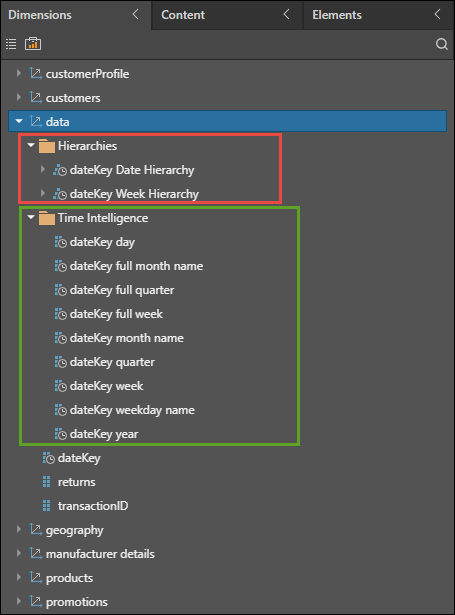
When the model is opened in Discover, we see the Time Intelligence components in two locations in the Dimensions tree:
Hierarchies: the Time Intelligence automatically creates logical hierarchies from the date/ time columns and places them in the Hierarchies folder (red highlight below).
Time Intelligence: each column generated by the Time Intelligence node is automatically placed in a Time Intelligence folder (green highlight).
